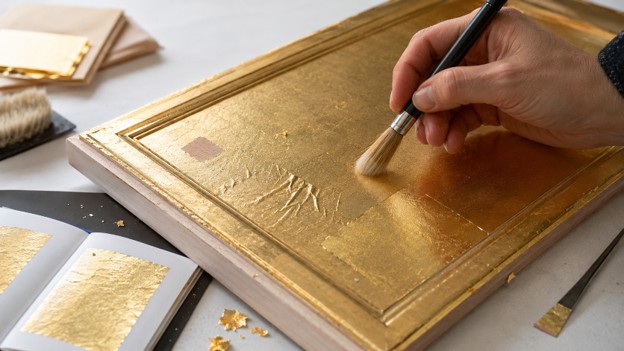
How to apply imitation gold leaf: a step-by-step gilding guide

Good surface preparation and correct application timing are the foundations of neat gilding.
Imitation gold leaf adds a metallic finish to frames, furniture, relief, decorative panels and artworks at a lower material cost than genuine gold. The result depends on a smooth, clean substrate, evenly applied gilding adhesive and patience when laying the leaf. Follow this step-by-step guide to avoid common first-project problems.
What is imitation gold leaf?
Imitation gold leaf, also called composition leaf or metal leaf, is typically made from a copper-zinc alloy. It offers a gold-coloured shine at a lower cost and is generally easier to handle than very thin genuine gold leaf. It suits larger interior surfaces, furniture, frames, scenery, crafts and decorative production. The alloy can react with moisture, air and handling, so a compatible clear protective finish is usually required. It is not intended for food contact or food decoration.
What do you need for gilding?
- Imitation gold leaf in suitable packaging
- Gilding adhesive, also called gilding size or mordant
- A clean, soft brush for laying and smoothing leaf
- Fine sandpaper if the substrate needs sanding
- A lint-free cloth and a suitable degreaser where needed
- Compatible primer or base colour
- A clear protective finish compatible with imitation leaf
- Cotton gloves to reduce fingerprints
Read the adhesive and protective coating instructions before starting. Drying time and the correct tack depend on the product, temperature, humidity and substrate absorbency.
How to apply imitation gold leaf in 8 steps
1. Choose a suitable surface
Imitation leaf can be applied to prepared wood, MDF, metal, glass, ceramics, plaster, canvas and many painted surfaces. The substrate must be stable, dry and compatible with the primer and adhesive. Plan suitable protection for frequently handled objects or damp locations.
2. Clean, level and seal the substrate if needed
Dust, grease, wax and loose old paint prevent even adhesion. Sand wood and MDF lightly where needed, remove dust and apply compatible primer. Seal porous surfaces so they do not absorb the adhesive too quickly. Check whether smooth metal or glass needs a specialist adhesion primer.
3. Choose the base colour
The colour beneath the leaf affects the finish, especially at fine joins and small gaps. Ochre, red or brown gives a warmer traditional appearance; black or dark grey creates stronger contrast. Neutral beige or white can produce a lighter effect. Make a sample before the full project.
4. Apply a thin, even coat of gilding adhesive
Apply adhesive only to an area you can cover within its open tack time. Avoid puddles and brush marks that may show through the metal. Cover recesses without allowing adhesive to collect in them. General-purpose glue is not a reliable replacement for a dedicated gilding product.
5. Wait for the correct tack
Do not lay leaf onto freshly wet adhesive. If it is too wet, the leaf may sink, wrinkle or lose its shine. If it has dried beyond its tack window, the leaf will not adhere. Follow the specific product’s instructions; there is no universal waiting time.
6. Lay the sheets with a small overlap
Avoid draughts and fans because even a slight airflow moves light leaf. Transfer it gently with clean hands or suitable tools. Lay it without pulling, letting it follow the relief. Overlap the next sheet slightly to avoid visible gaps at the joins.
7. Smooth, remove excess and fill gaps
Use a soft, dry brush to press the leaf gently into details and remove loose excess. Do not rub hard while the adhesive is still soft. Fill small gaps with fragments while the adhesive is active. Save offcuts for repairs and decorative textures.
8. Apply compatible protection
Once the adhesive and leaf have fully dried and stabilised, apply a clear finish approved for metal leaf. Protection slows darkening and reduces damage from moisture, handling and abrasion. Test the leaf, adhesive and coating together because some coatings change colour or shine.
Different substrates
- Wood and MDF: seal edges and cut surfaces, which are more absorbent.
- Metal: remove grease and corrosion; use a suitable metal primer if needed.
- Glass and ceramics: degrease thoroughly and use a system suitable for non-porous surfaces.
- Plaster and walls: stabilise dusty surfaces and prime evenly before adhesive.
- Canvas and art supports: use a stable prepared surface and account for movement that could damage the leaf and finish.
Frequently asked questions
Can I use ordinary glue for imitation gold leaf?
For a predictable result, use dedicated gilding adhesive. Ordinary glue can leave uneven marks, dry too quickly, remain soft or be incompatible with your protective coating.
Does imitation gold leaf need sealing?
Usually, yes. Copper-containing imitation leaf can darken or change colour, especially with moisture and handling. Use a compatible finish and test a sample first.
Can gilding be repaired locally?
Small gaps can usually be repaired locally: clean the area, apply adhesive precisely, wait for tack, lay a fragment and protect the repaired spot after drying.
Choose leaf for your project
The most useful format and quantity depend on whether you are working on flat areas, carved details or larger projects. Explore imitation gold leaf in our. If you are unsure about quantities or your gilding system, send an enquiry through our.