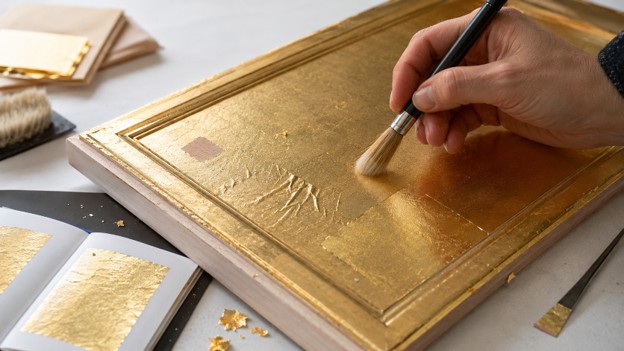
Gilding furniture and picture frames with imitation gold leaf
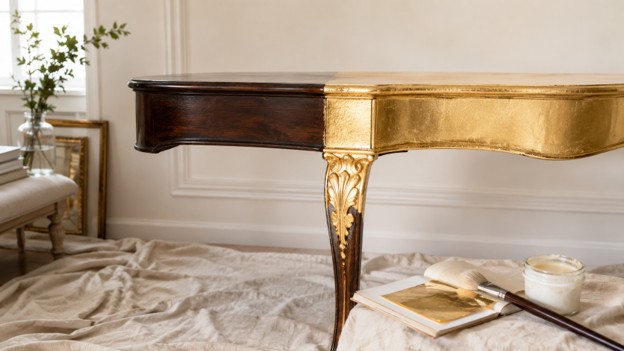
Gilding edges and carved details can transform the appearance of an old piece of furniture.
Imitation gold leaf can give a table, cabinet, console, mirror or picture frame a new character. It highlights carvings, shaped edges and details that may disappear under ordinary paint. Often the best result comes from carefully chosen accents that catch the light and emphasise the object’s shape.
Why use imitation gold leaf on furniture and frames?
Imitation leaf is practical for interior decorative projects because it costs less than genuine gold and is available in larger formats. Use it across a small object or as an accent on edges, legs, mouldings and carvings. The finish remains decorative: worktops, seats, handles and heavily cleaned areas need carefully planned protection. Less exposed details may give a longer-lasting result.
Which objects are good candidates?
- Wooden and MDF picture or mirror frames
- Console and side tables, especially shaped edges and legs
- Cabinet fronts and decorative mouldings
- Carved details on cupboards, headboards and wall panels
- Decorative boxes, stands, plinths and smaller objects
- Interior mouldings and rosettes away from moisture
Assess the existing finish first
Old furniture may have varnish, wax, oil or paint. Wax and grease reduce adhesion. If an existing layer is peeling or cracking, new gilding will not stabilise it. Remove or professionally consolidate unstable layers. Seek a restorer’s advice before sanding valuable antiques or removing original finishes.
How to gild wooden furniture and frames
1. Dismantle and protect the object
Where possible, remove hardware, glass, pictures, textiles and parts that will not be gilded. Mask edges with tape suitable for delicate coatings. Mark the gilded areas before starting to keep the design balanced.
2. Clean and repair the substrate
Remove dirt with a cleaner suitable for the material. Fill unwanted dents, secure loose ornaments and smooth rough transitions. Gilding reveals scratches, old paint drips and poor preparation as well as attractive relief.
3. Prime porous and repaired areas
Bare wood, MDF, filler and plaster absorb adhesive differently. Even priming improves tack control. Apply thin layers to carved frames so fine details remain visible.
4. Apply a base colour
Red or ochre creates warmth and softens the appearance of small gaps. A dark base gives a more dramatic finish; a light base feels softer. The base colour also forms part of a deliberately distressed design.
5. Apply gilding adhesive
Use a size suitable for the substrate and indoor gilding. Apply a thin, even layer without pooling in carvings. Work in manageable sections so each can be covered during the correct tack window.
6. Lay leaf from flat areas to more complex details
Keep a regular pattern and slight overlaps on broad areas. Smaller pieces are often easier on mouldings and recesses. A soft brush helps the leaf follow carvings, but excessive pressure may tear or displace it.
7. Fill joins and tidy edges
Inspect under side lighting after gentle brushing. Fill gaps with small fragments and define masked edges carefully before the adhesive fully hardens.
8. Protect and reassemble
After complete drying, apply compatible clear protection. Matt, satin and gloss finishes affect the appearance, so test first. Replace hardware and glass after full curing and avoid rubbing the fresh surface.
How to calculate the quantity of leaf
Estimate the area first. A 16 × 16 cm sheet covers 0.0256 m² before overlaps and waste; a 14 × 14 cm sheet covers 0.0196 m². Allow roughly 10–20% extra for a simple flat surface, and potentially 25–40% for deep carvings, many edges or beginner work. For 0.50 m² with 16 × 16 cm sheets, the theoretical requirement is about 20 sheets; prepare at least 22–24 for a simple surface and more for complex profiles. These are estimates: a trial piece gives a better guide.
Full gilding or gold accents?
Full gilding makes a strong statement but reveals every preparation defect. Selective accents fit many contemporary interiors: a narrow frame edge, table leg, carved rosette or cabinet moulding may be enough. Repeating a detail creates visual unity.
Caring for gilded furniture
- Remove dust with a soft, dry cloth or very soft brush.
- Avoid abrasive sponges, metal polish and strong solvents.
- Avoid prolonged moisture, condensation and direct splashes.
- Do not drag objects over the gilding or attach tape to the finished surface.
- Repair small damage before its edges begin to lift further.
Materials for your next project
Choose a leaf format suited to the size and relief of your furniture, frames or decorative wooden surfaces. Browse the range in our, and explore application examples in our. For help estimating quantities, send dimensions and a project photograph through our contact page.